How to categorize products in inFlow
By organizing products into different categories, your business can keep track of what’s in stock and easily locate products when needed.
Web
You can organize your products by choosing the correct category from the Product Record. You can add new categories to inFlow from the Product categories settings.
Adding categories to inFlow
This feature can be found in the Inventory settings of inFlow.
- Go to inFlow’s Inventory settings. (Main Menu > Settings
 > Inventory.)
 - Click on Product Categories.
- Rename the “Default Category” to the name of your most used product category.
- Click +Add main category to add more categories.
- Select the star next to the category that should be the default in inFlow.
- When done, click the Save button.

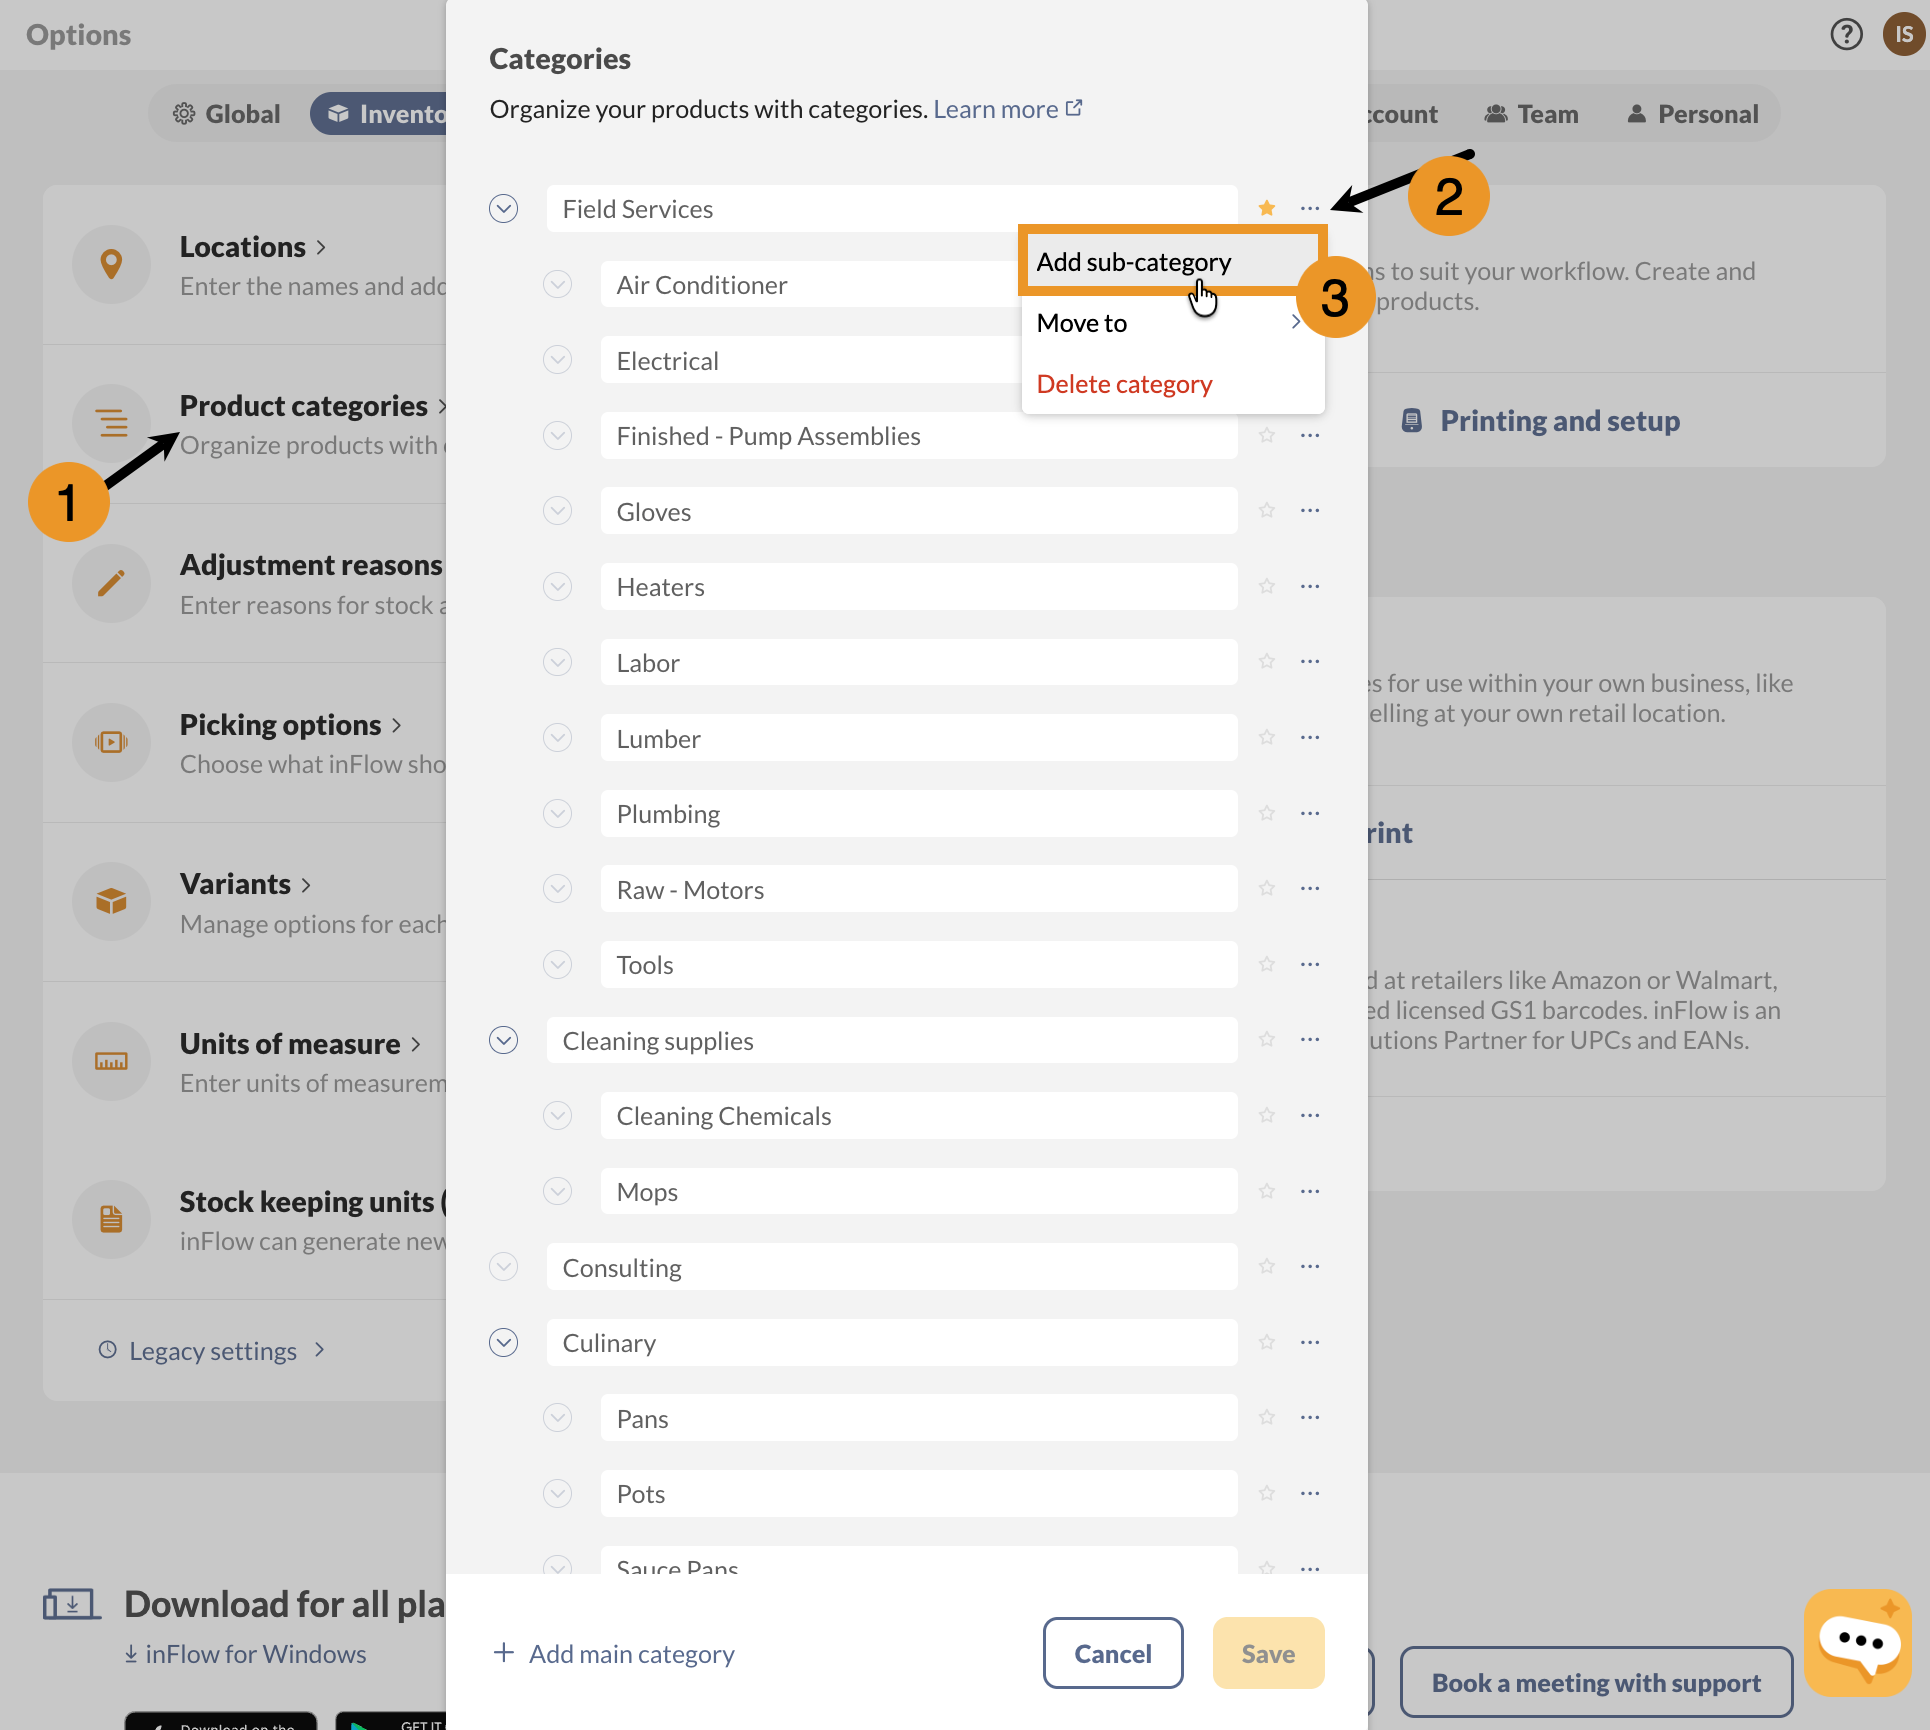
Creating sub-categories
Subcategories can be added by clicking the ellipsis next to the main category you’d like to connect them to.
Once you’ve added subcategories, you will see a clickable blue arrow next to the main category that expands and collapses to show or hide the subcategories.
Categories and sub-categories can be moved by clicking on the ellipsis of the category you want to move.
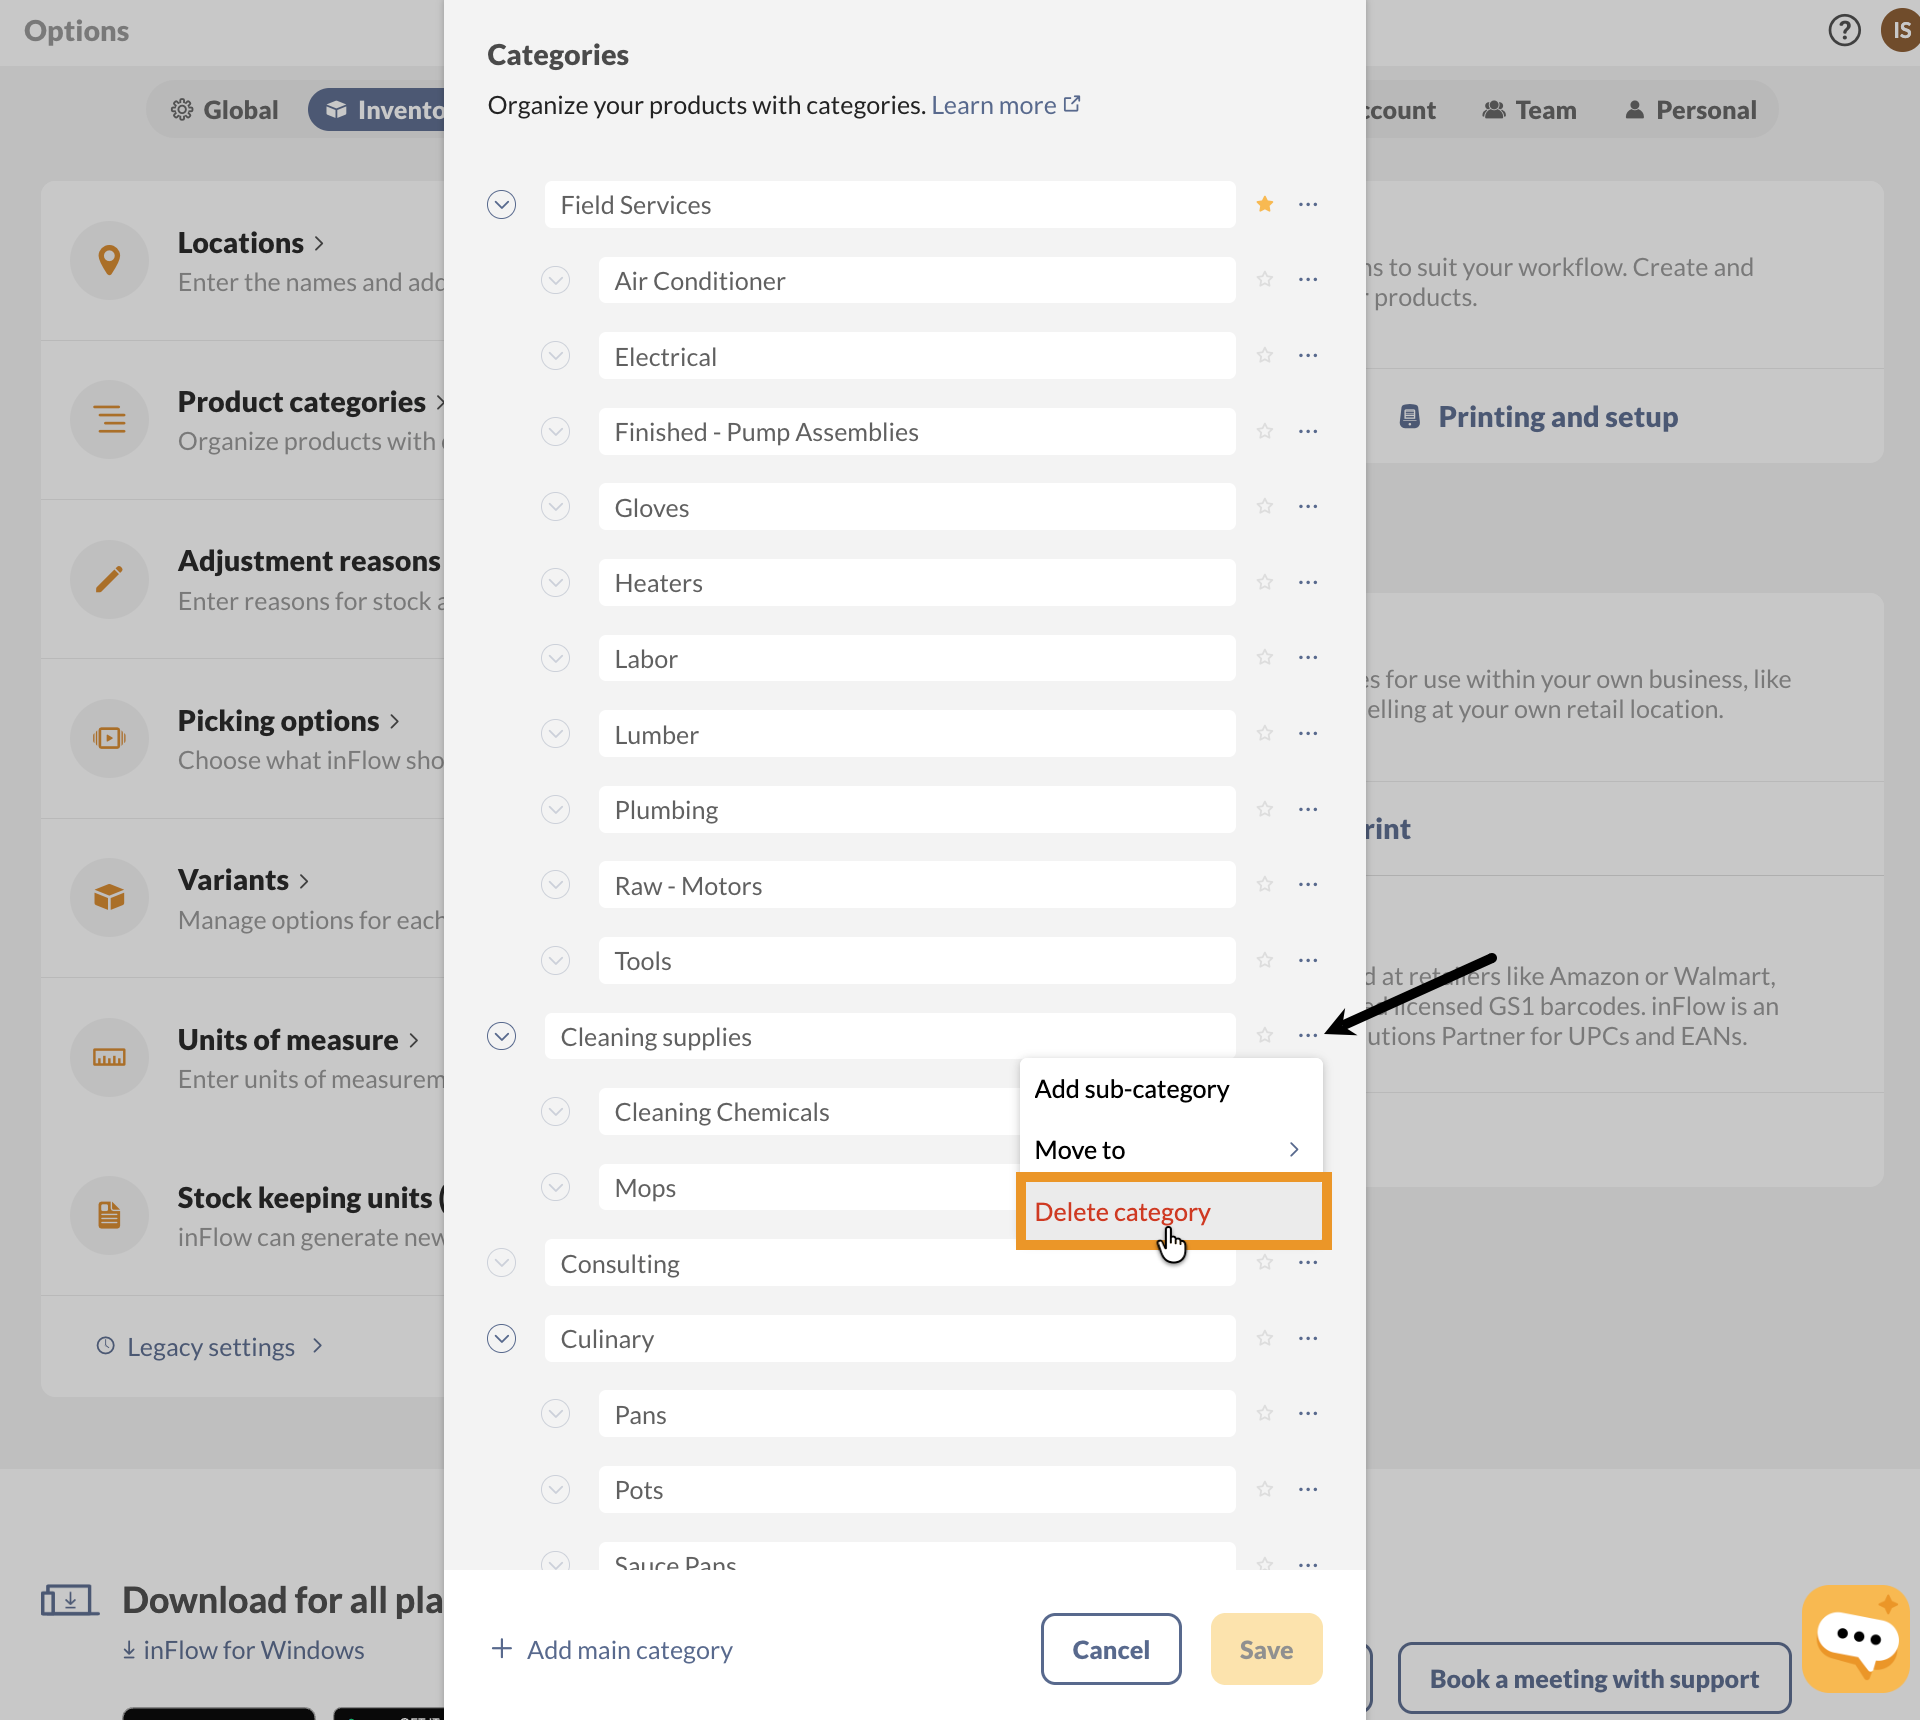
Deleting categories/sub-categories
If you delete a main category, inFlow will warn you that items will be moved to the first listed category. If you delete a sub-category while items are still in it, the items will automatically be moved to the main category.
- Go to the Inventory settings in inFlow, then click on Product categories.
- Click on the ellipsis next to the category you want to remove, then click on Delete category.
- Click Save when done.
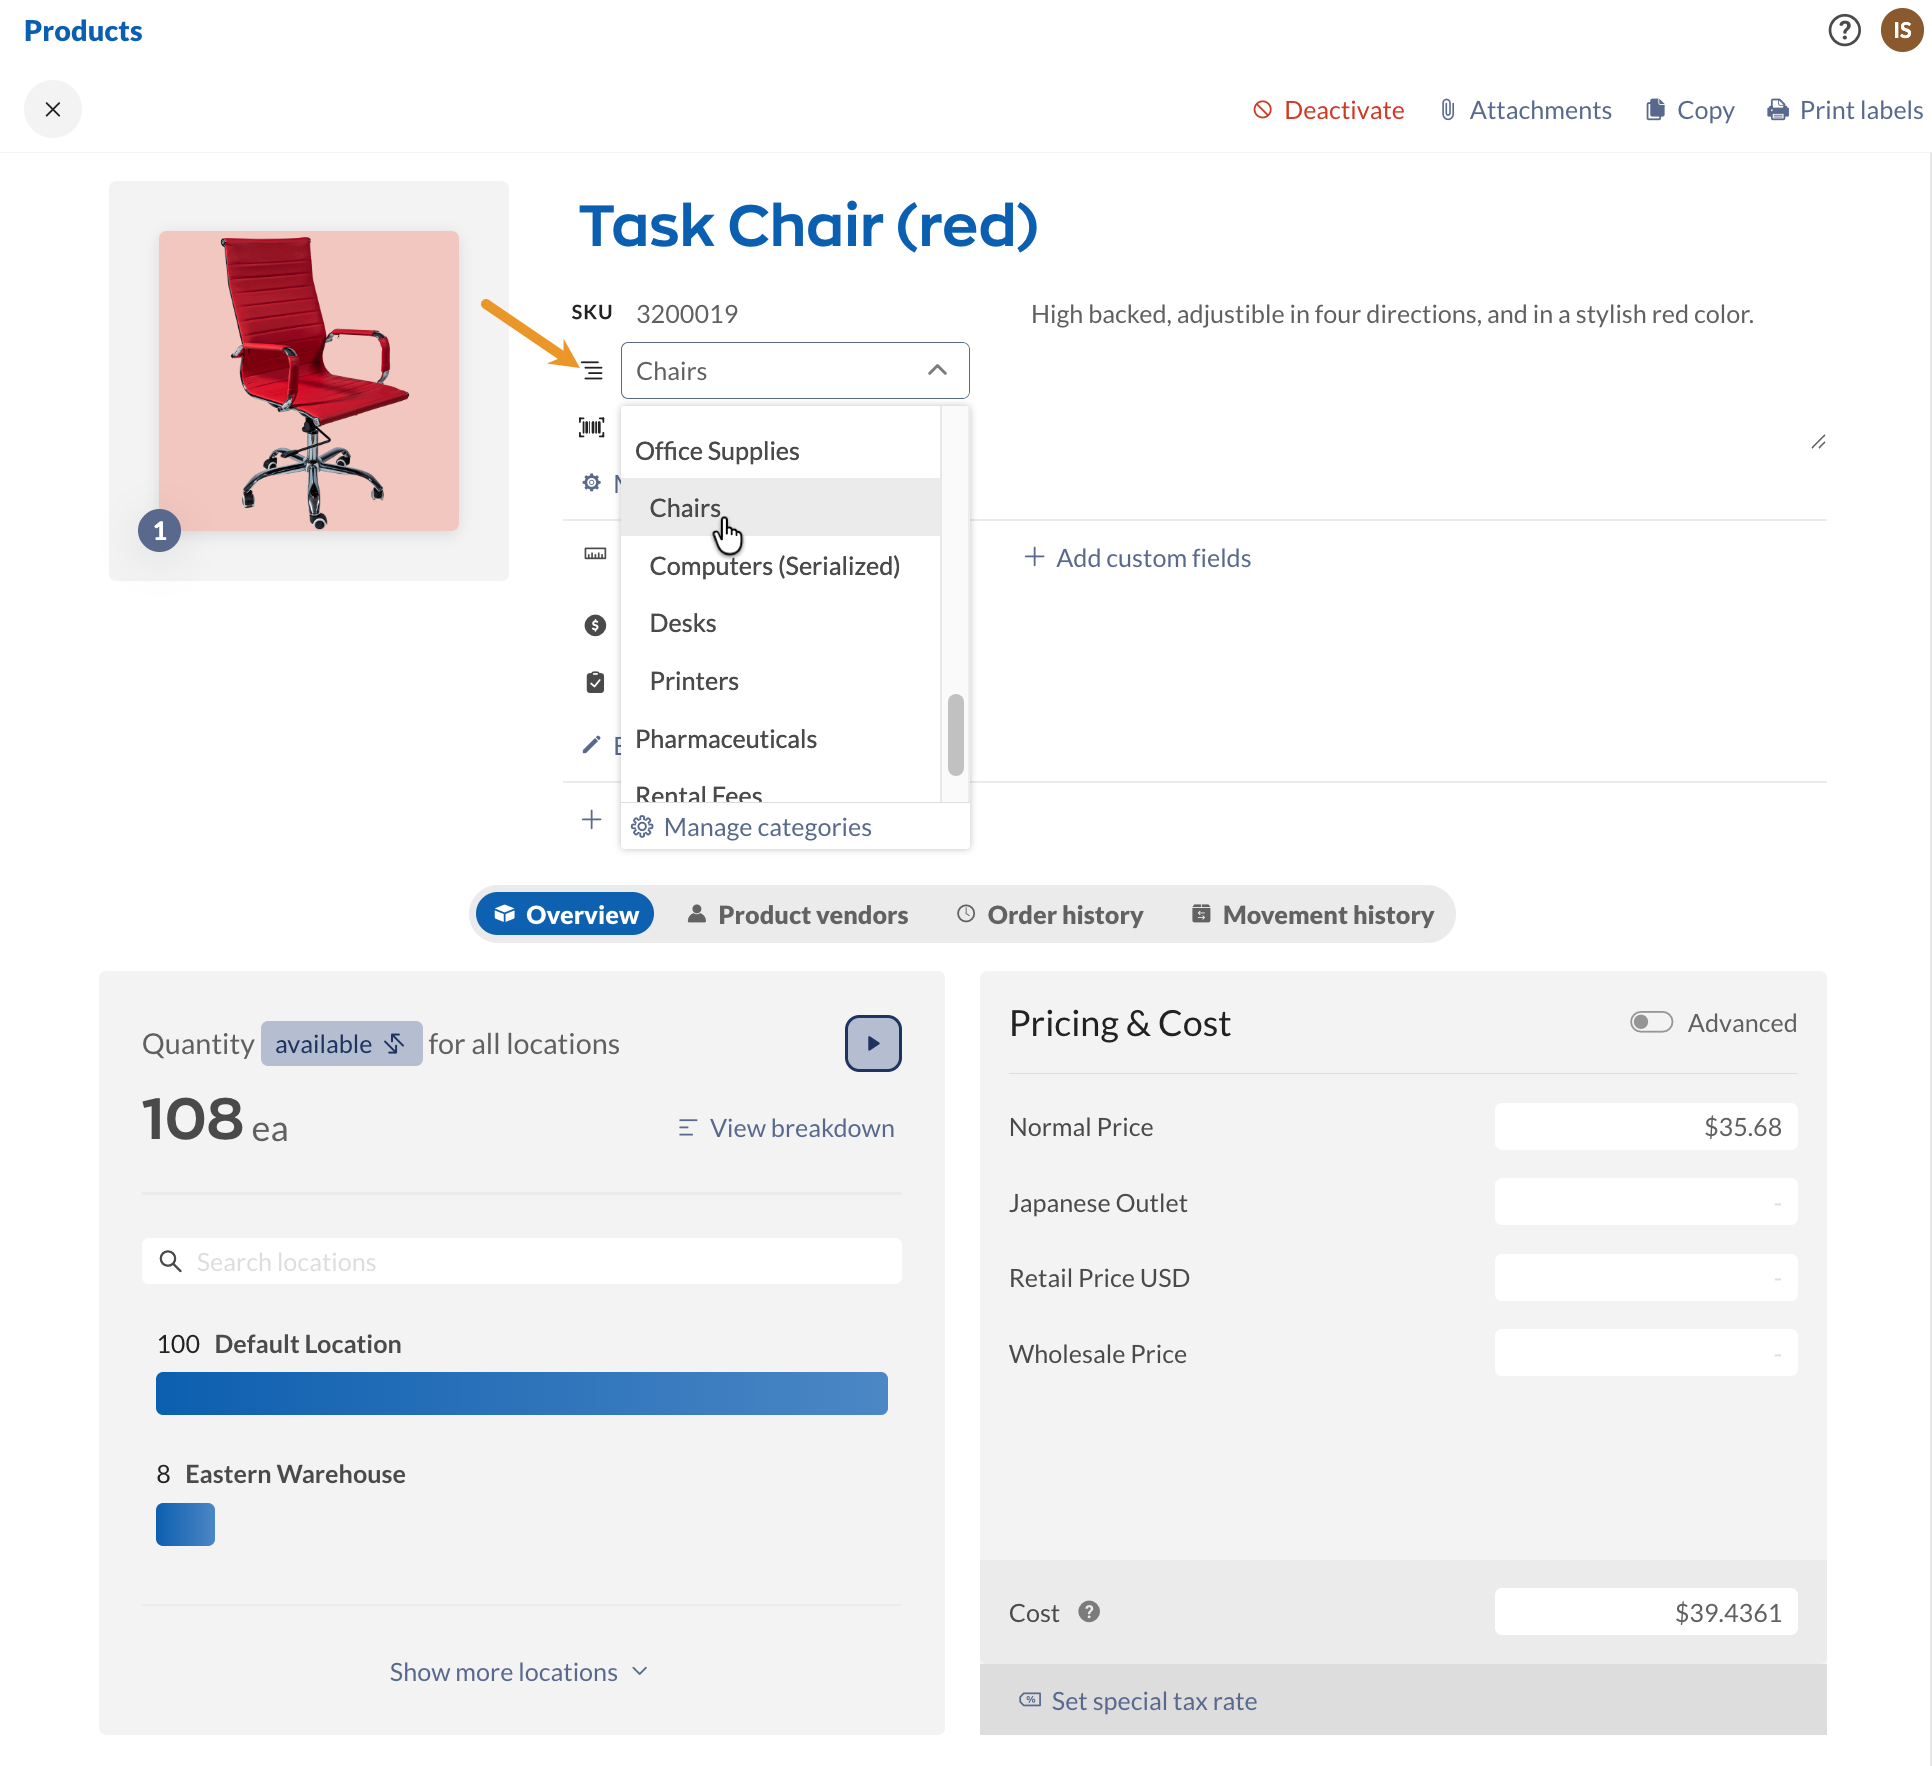
Adding a category to a product
- On the product record, select the category drop-down menu (Under the SKU field)
- Select from the list, or click on Manage categories to add a category to the list.
- Save the product record.
Windows
You can organize your products by choosing the correct category from the Product Record. New categories can be added to inFlow from the Product categories settings.
Adding categories to inFlow
- Click Main Menu > Inventory > Product Categories.
- Click the Add button at the bottom of the page.
- They can be rearranged by clicking and dragging them to the desired position.
- Categories can be removed by highlighting them and clicking the remove button at the bottom of the screen.
- Finally, you can rename them by right-clicking the category you want to rename and choosing Rename!
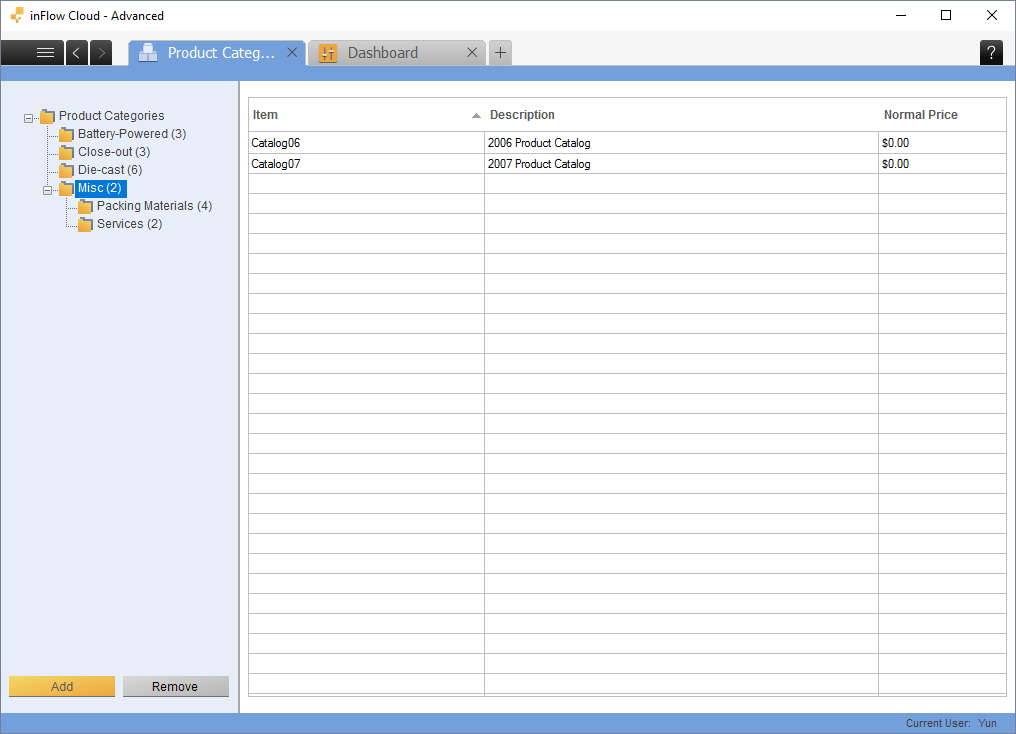
Creating sub-categories
You can create sub-categories by dragging categories into others in the Product Category view. Once you’ve added categories to another, you should see a plus sign on the left to indicate that there is a subordinate item there (as pictured above). Subcategories can also be used to show product type (such as clothing vs. electronics etc.).
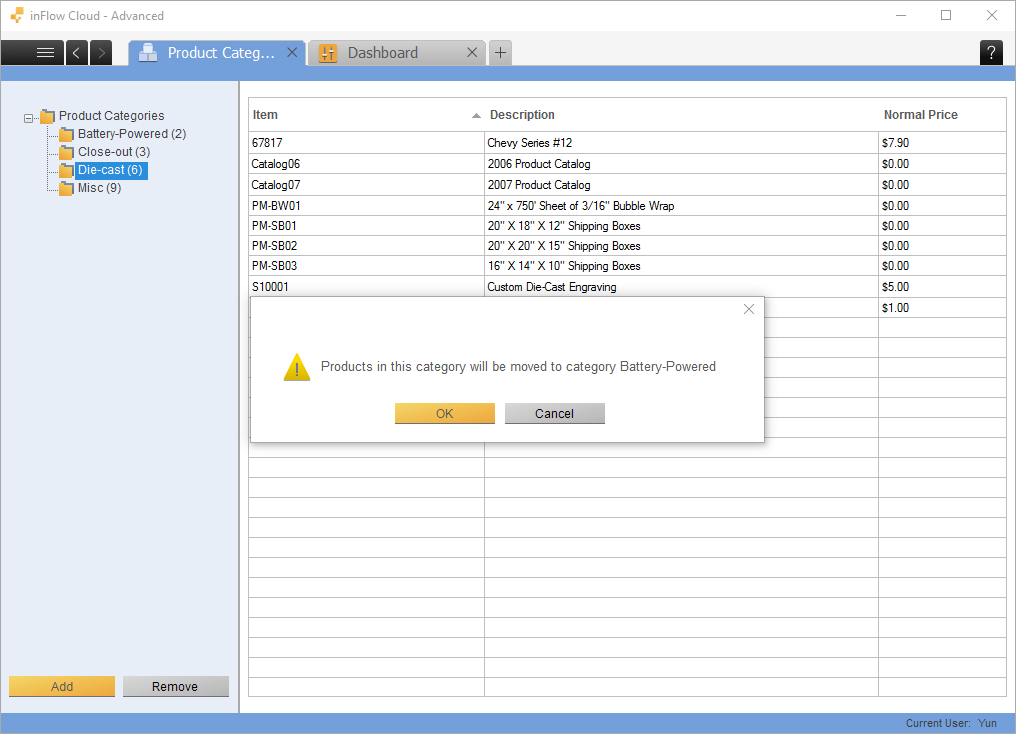
Deleting categories
If you delete a sub-category while items are still in it, the items will automatically be moved to the main category.
If you delete a main category, inFlow will warn you that the items will be moved to the first category listed.


0 Comments