Adding inventory to Stockroom
Adding inventory to Stockroom is a key step before your team begins using the app. In this guide, we’ll walk you through the various ways to add your products.

Products can only be added in Stockroom for Web, and once added, they can be scanned out using the Stockroom app.
If you have 10 or more products, we recommend importing them from a CSV file.
Adding products in bulk (CSV import)
Importing Products: CSV setup
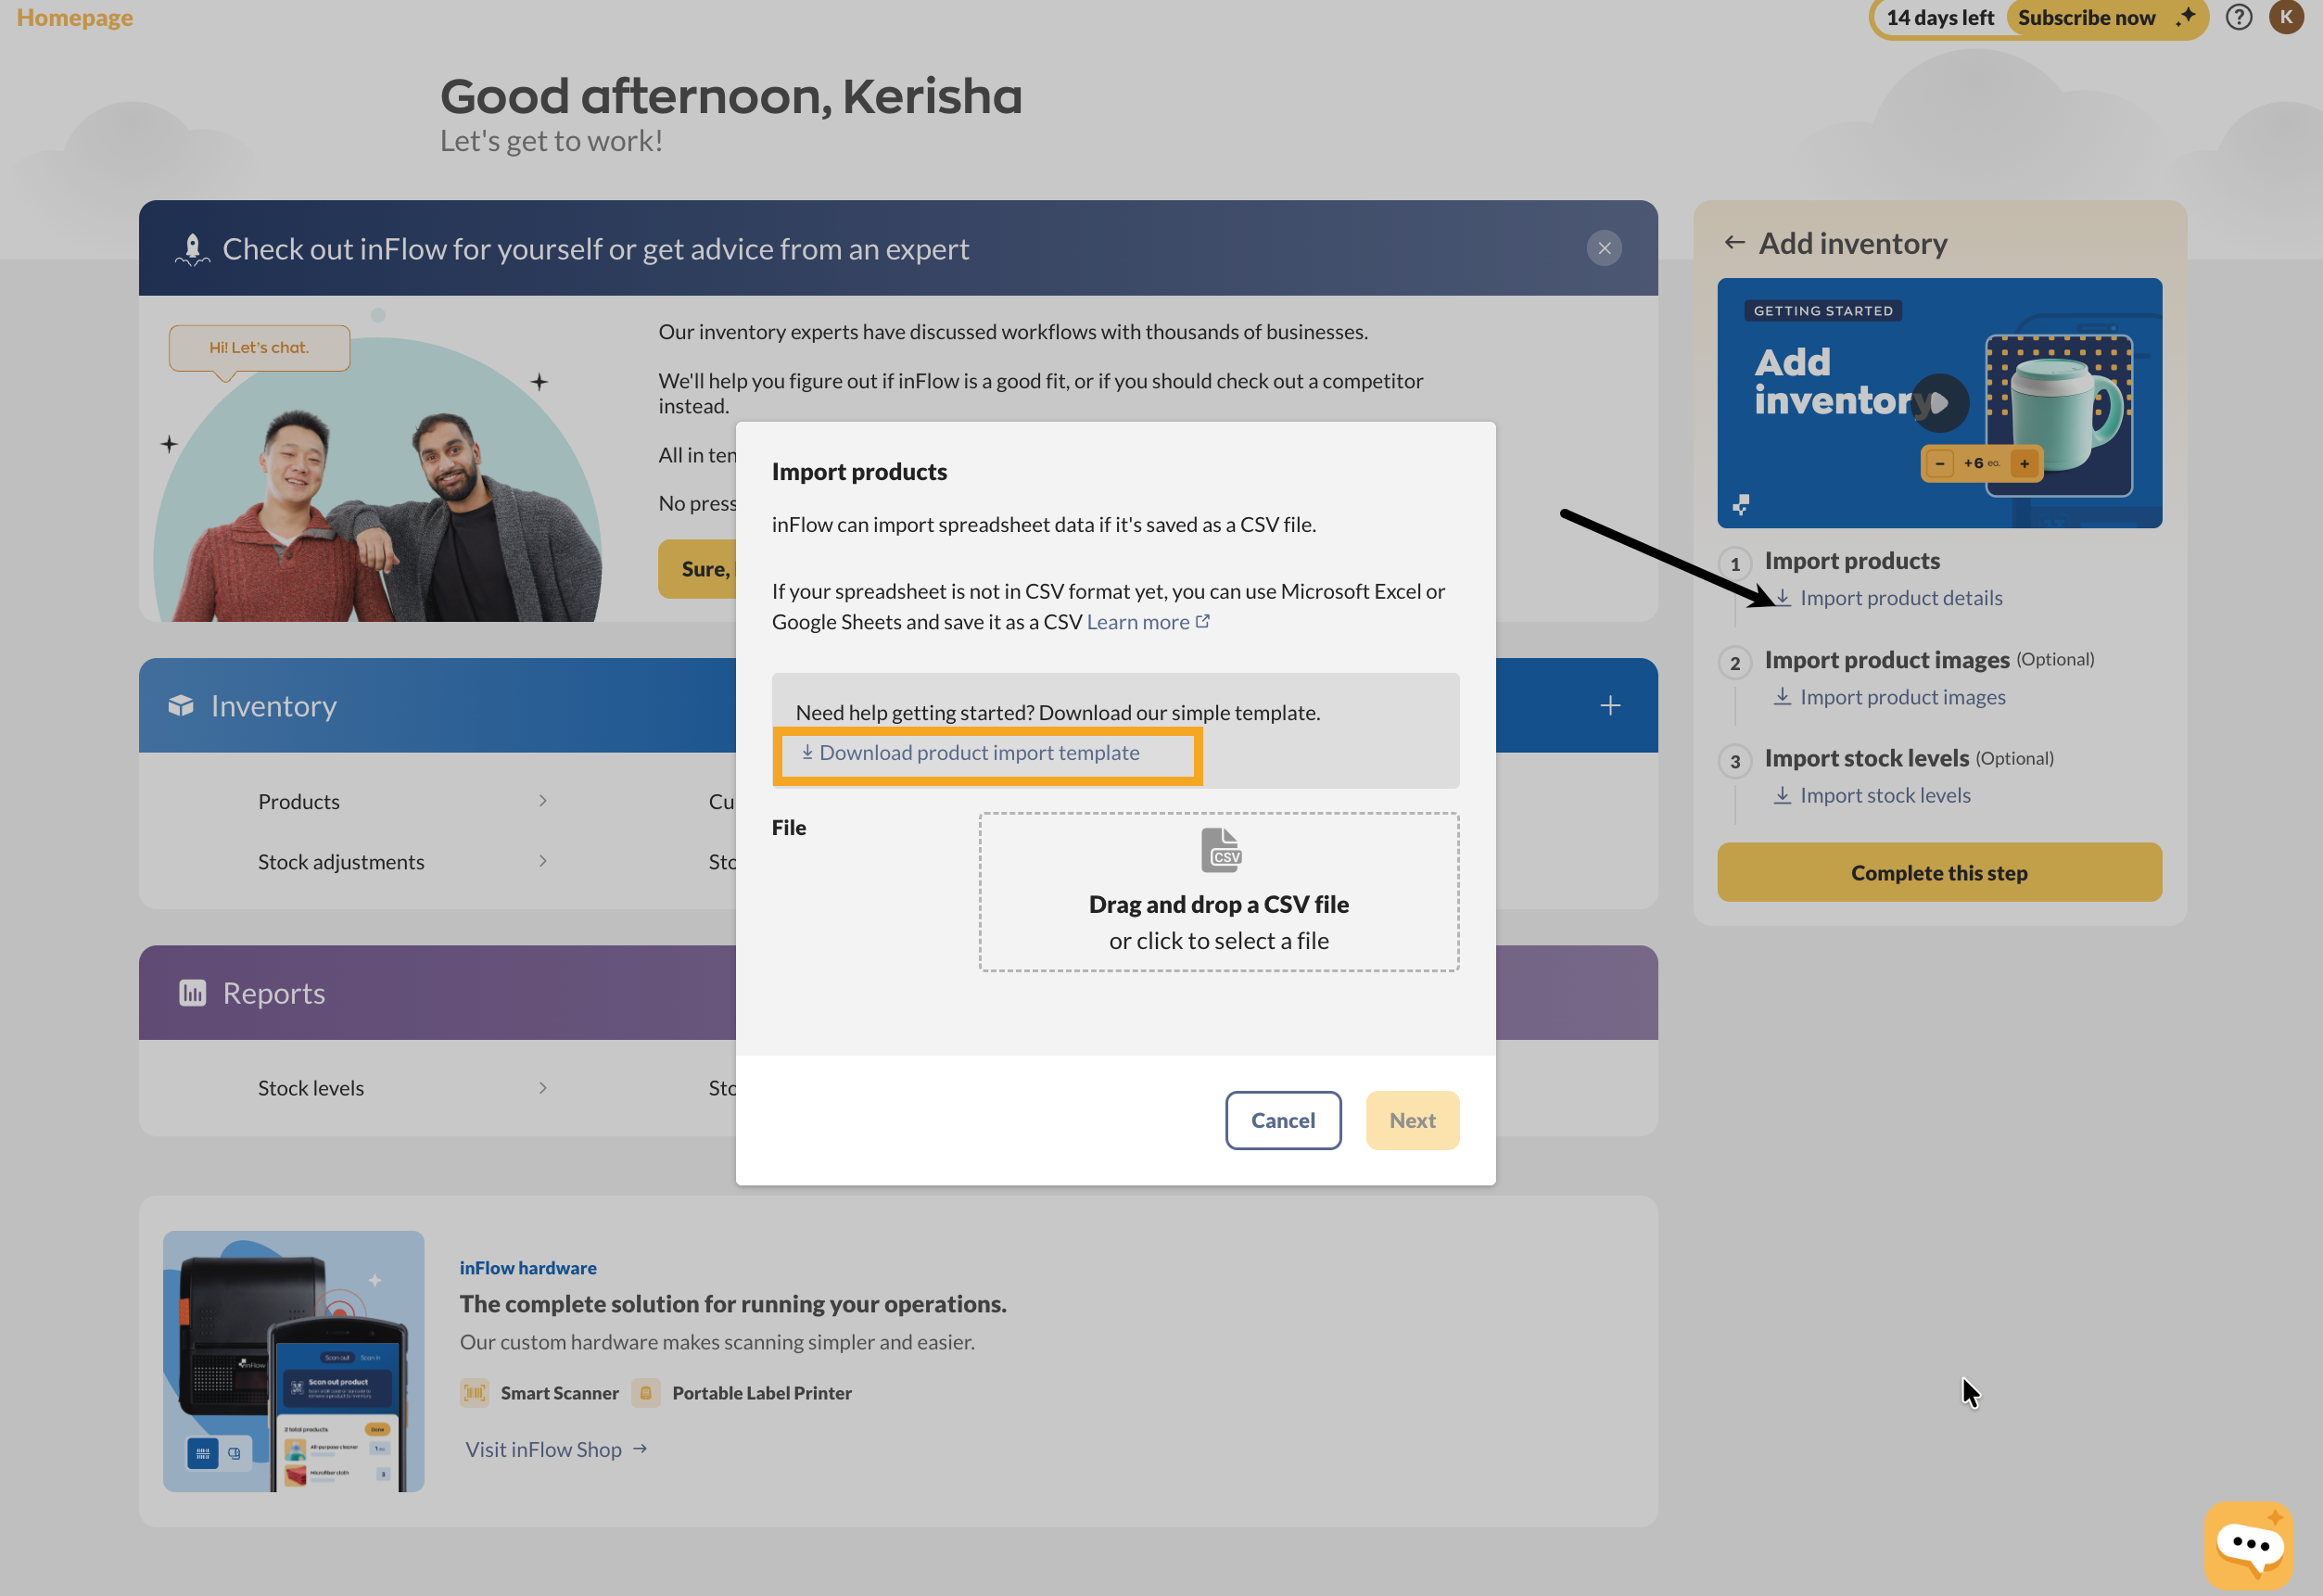
To import products, we’ll need to create a CSV template that Stockroom will use to create products. We can do this by downloading a template from the import settings.
- From the Setup checklist, click Add inventory, then select Import product details. You can hover over the Settings icon in the Main Menu>Import.
- Click Download product import template to save the CSV file to your computer.
- Open the CSV file. Each heading in the CSV represents a field in the Stockroom product record.
- Fill out the columns on the spreadsheet with your product information.
- If you don’t have information for all columns, feel free to leave some blank; only the product name column is required to import products.
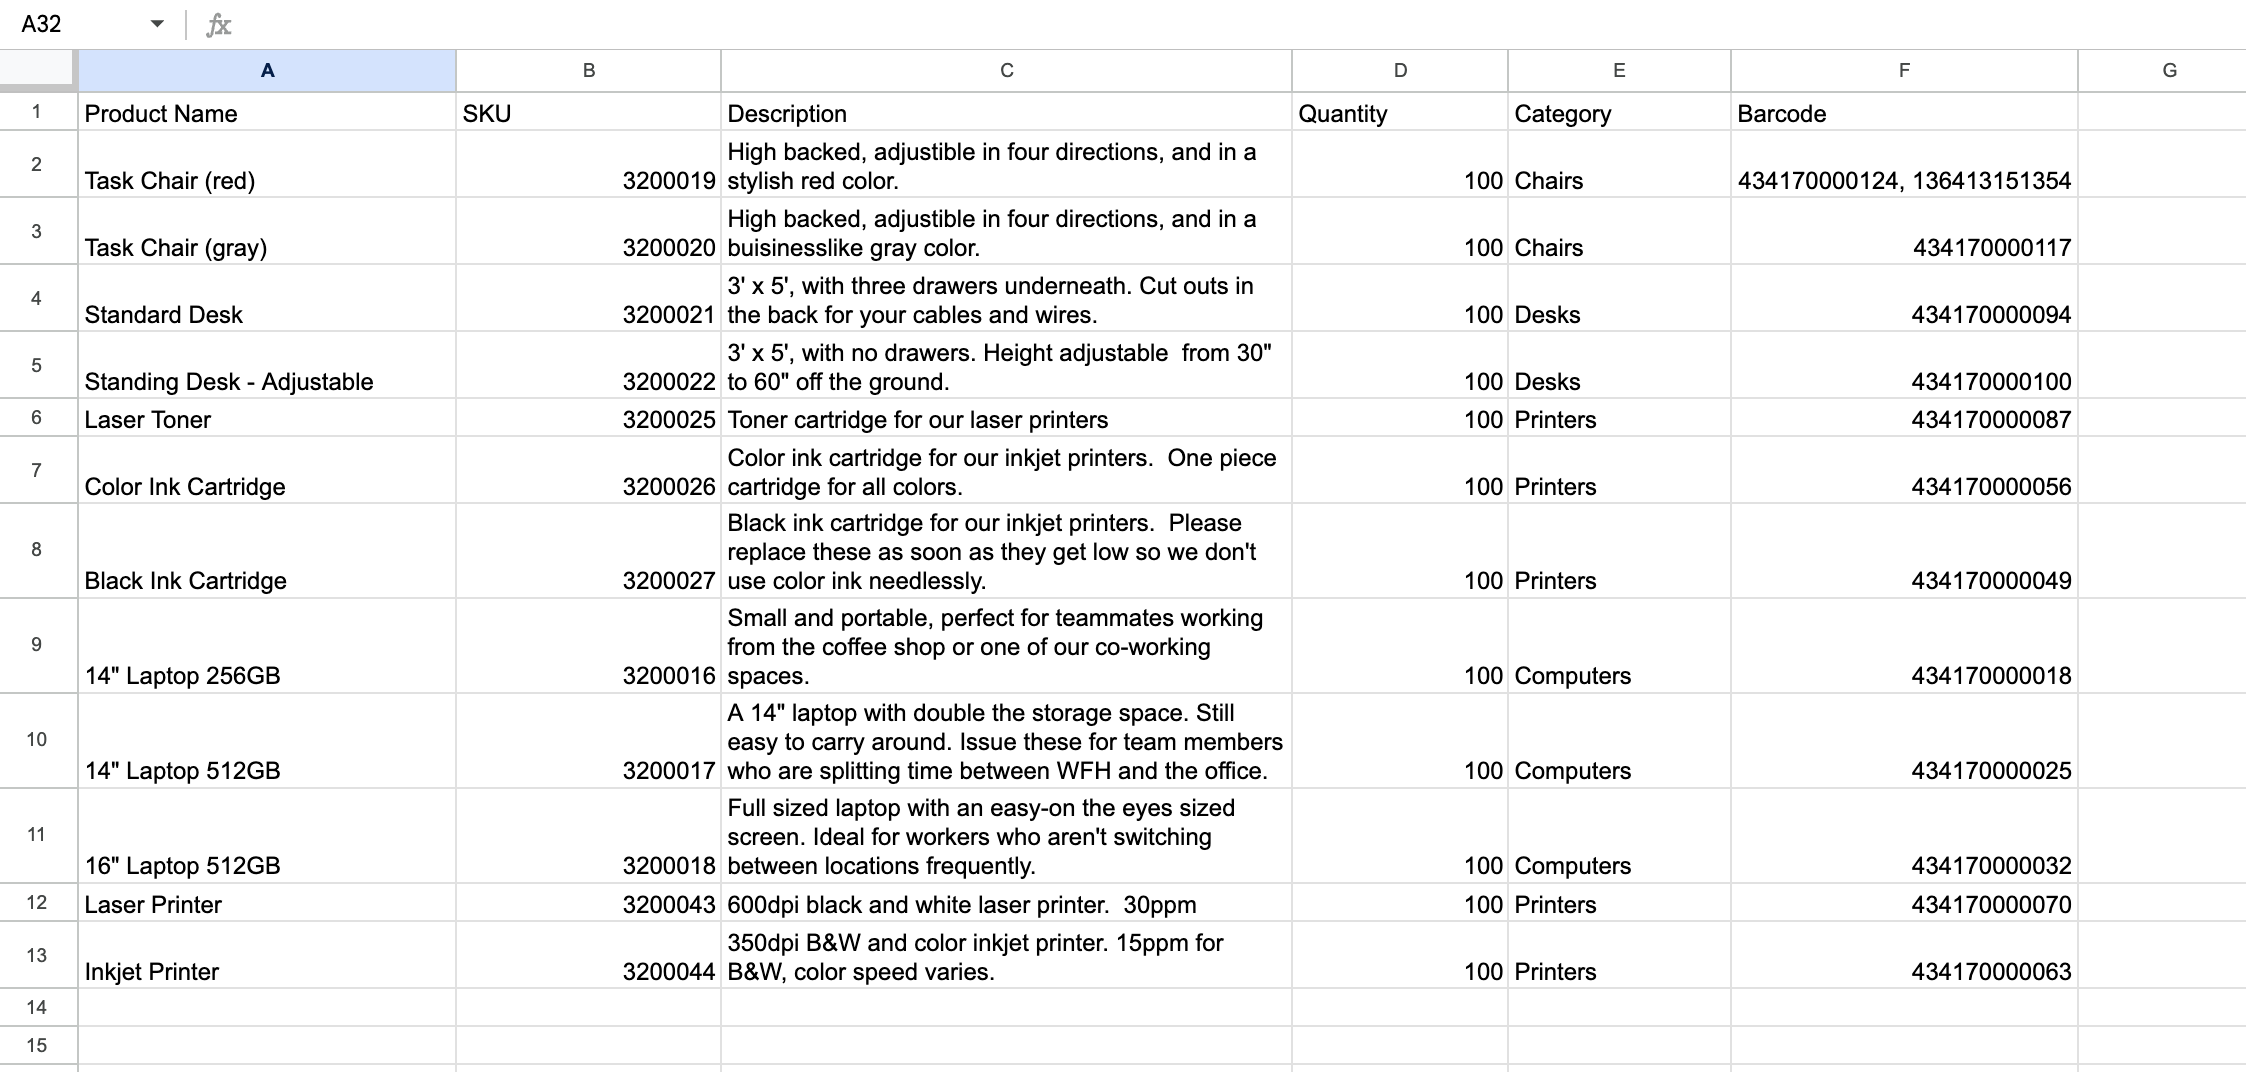
- If you already have a product list in a spreadsheet, you can copy the headings from this template into that spreadsheet so Stockroom will recognize the product information you’re importing.
- Once complete, save the spreadsheet as a CSV file. If using Excel, export as a UTF-8 CSV file.
Importing your products to Stockroom
- Return to the Stockroom homepage. If the Import window isn’t open, select Add inventory > Import product details.
- Below, choose the CSV file from your computer, then click Next.
- And that’s it! You’ll see a message indicating that your import is in progress. You’ll receive an email once the import is finished.
You can view your products by selecting the Inventory icon from the main menu, then clicking on Products. Double-click a product to see its details.
To update your product details at any time:
- Add the new information to your CSV file, then re-import it by clicking the Settings icon >Import.
- For the Data type, select Product details. Then select your CSV file to complete the import.
As long as the product names in the CSV exactly match the existing product names, Stockroom will update your products.
Product stock levels (CSV import)
Stock levels import: CSV setup
If you’d like to add your product quantity/stock levels, you can also import them into Stockroom using a CSV file.
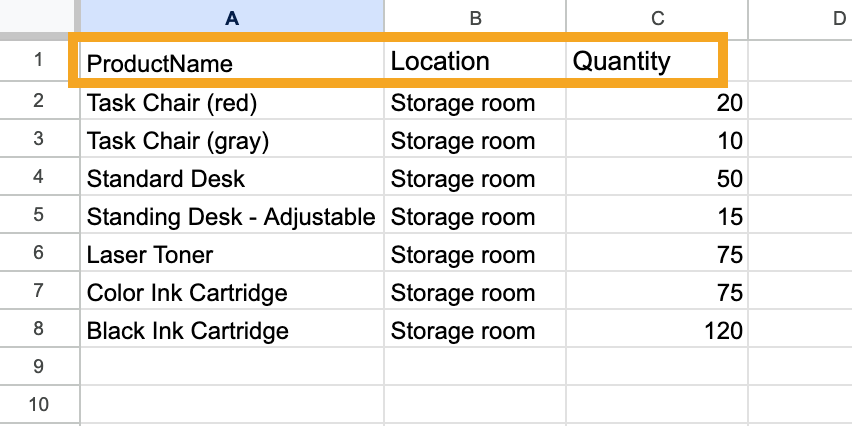
Adding the product quantities is a similar process to importing products, but this time, the CSV template only needs the following columns:
- Product name
- Location
- Quantity
Fill in your spreadsheet with the product stock levels.
The product names in the spreadsheet must exactly match the names of your products in Stockroom.
If the spreadsheet has a product name that does not exactly match a record in Stockroom, the system will create a new product record for that item.
Importing stock levels to Stockroom
- Go back to Stockroom for Web, hover over the Settings icon in the Main Menu>Import.
- Select Stock levels from the Data type drop-down menu.
- Below, choose the CSV file from your computer, then click Next.
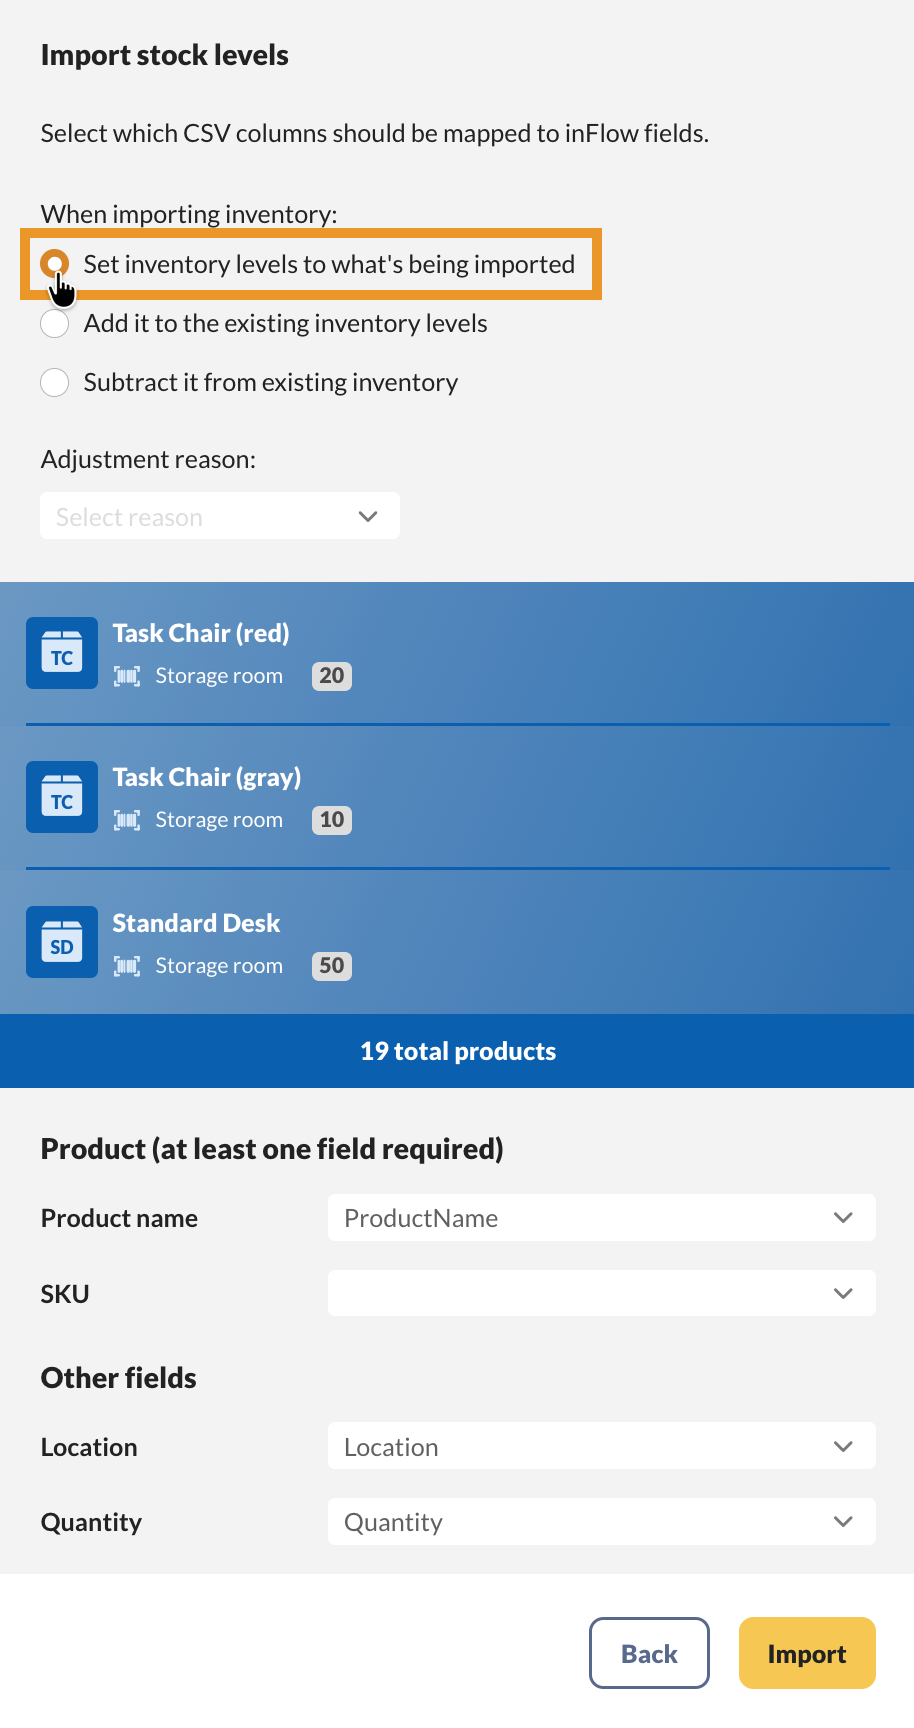
- At the top of the import settings, select Set inventory levels to what’s being imported.
- Optionally, click the Adjustment drop-down menu to add a reason for import (this will appear in the remarks fields of the Stock adjustment made from this import).
- Match the Product name, Location, and Quantity fields to the matching fields in the drop-down menus.
- Click Import.
Creating & editing products manually
Now, let’s go over how to create a stockroom product and go over the product record.
- Select the Create button from the Main menu, then Product.
- Fill out the Product name, then choose the product type.
- Stocked products are physical items you track by location and quantity.
- Non-stocked products are items you want to track but don’t need to know their quantities. This is great for tracking office or shipping supplies.
- When done, click Create.
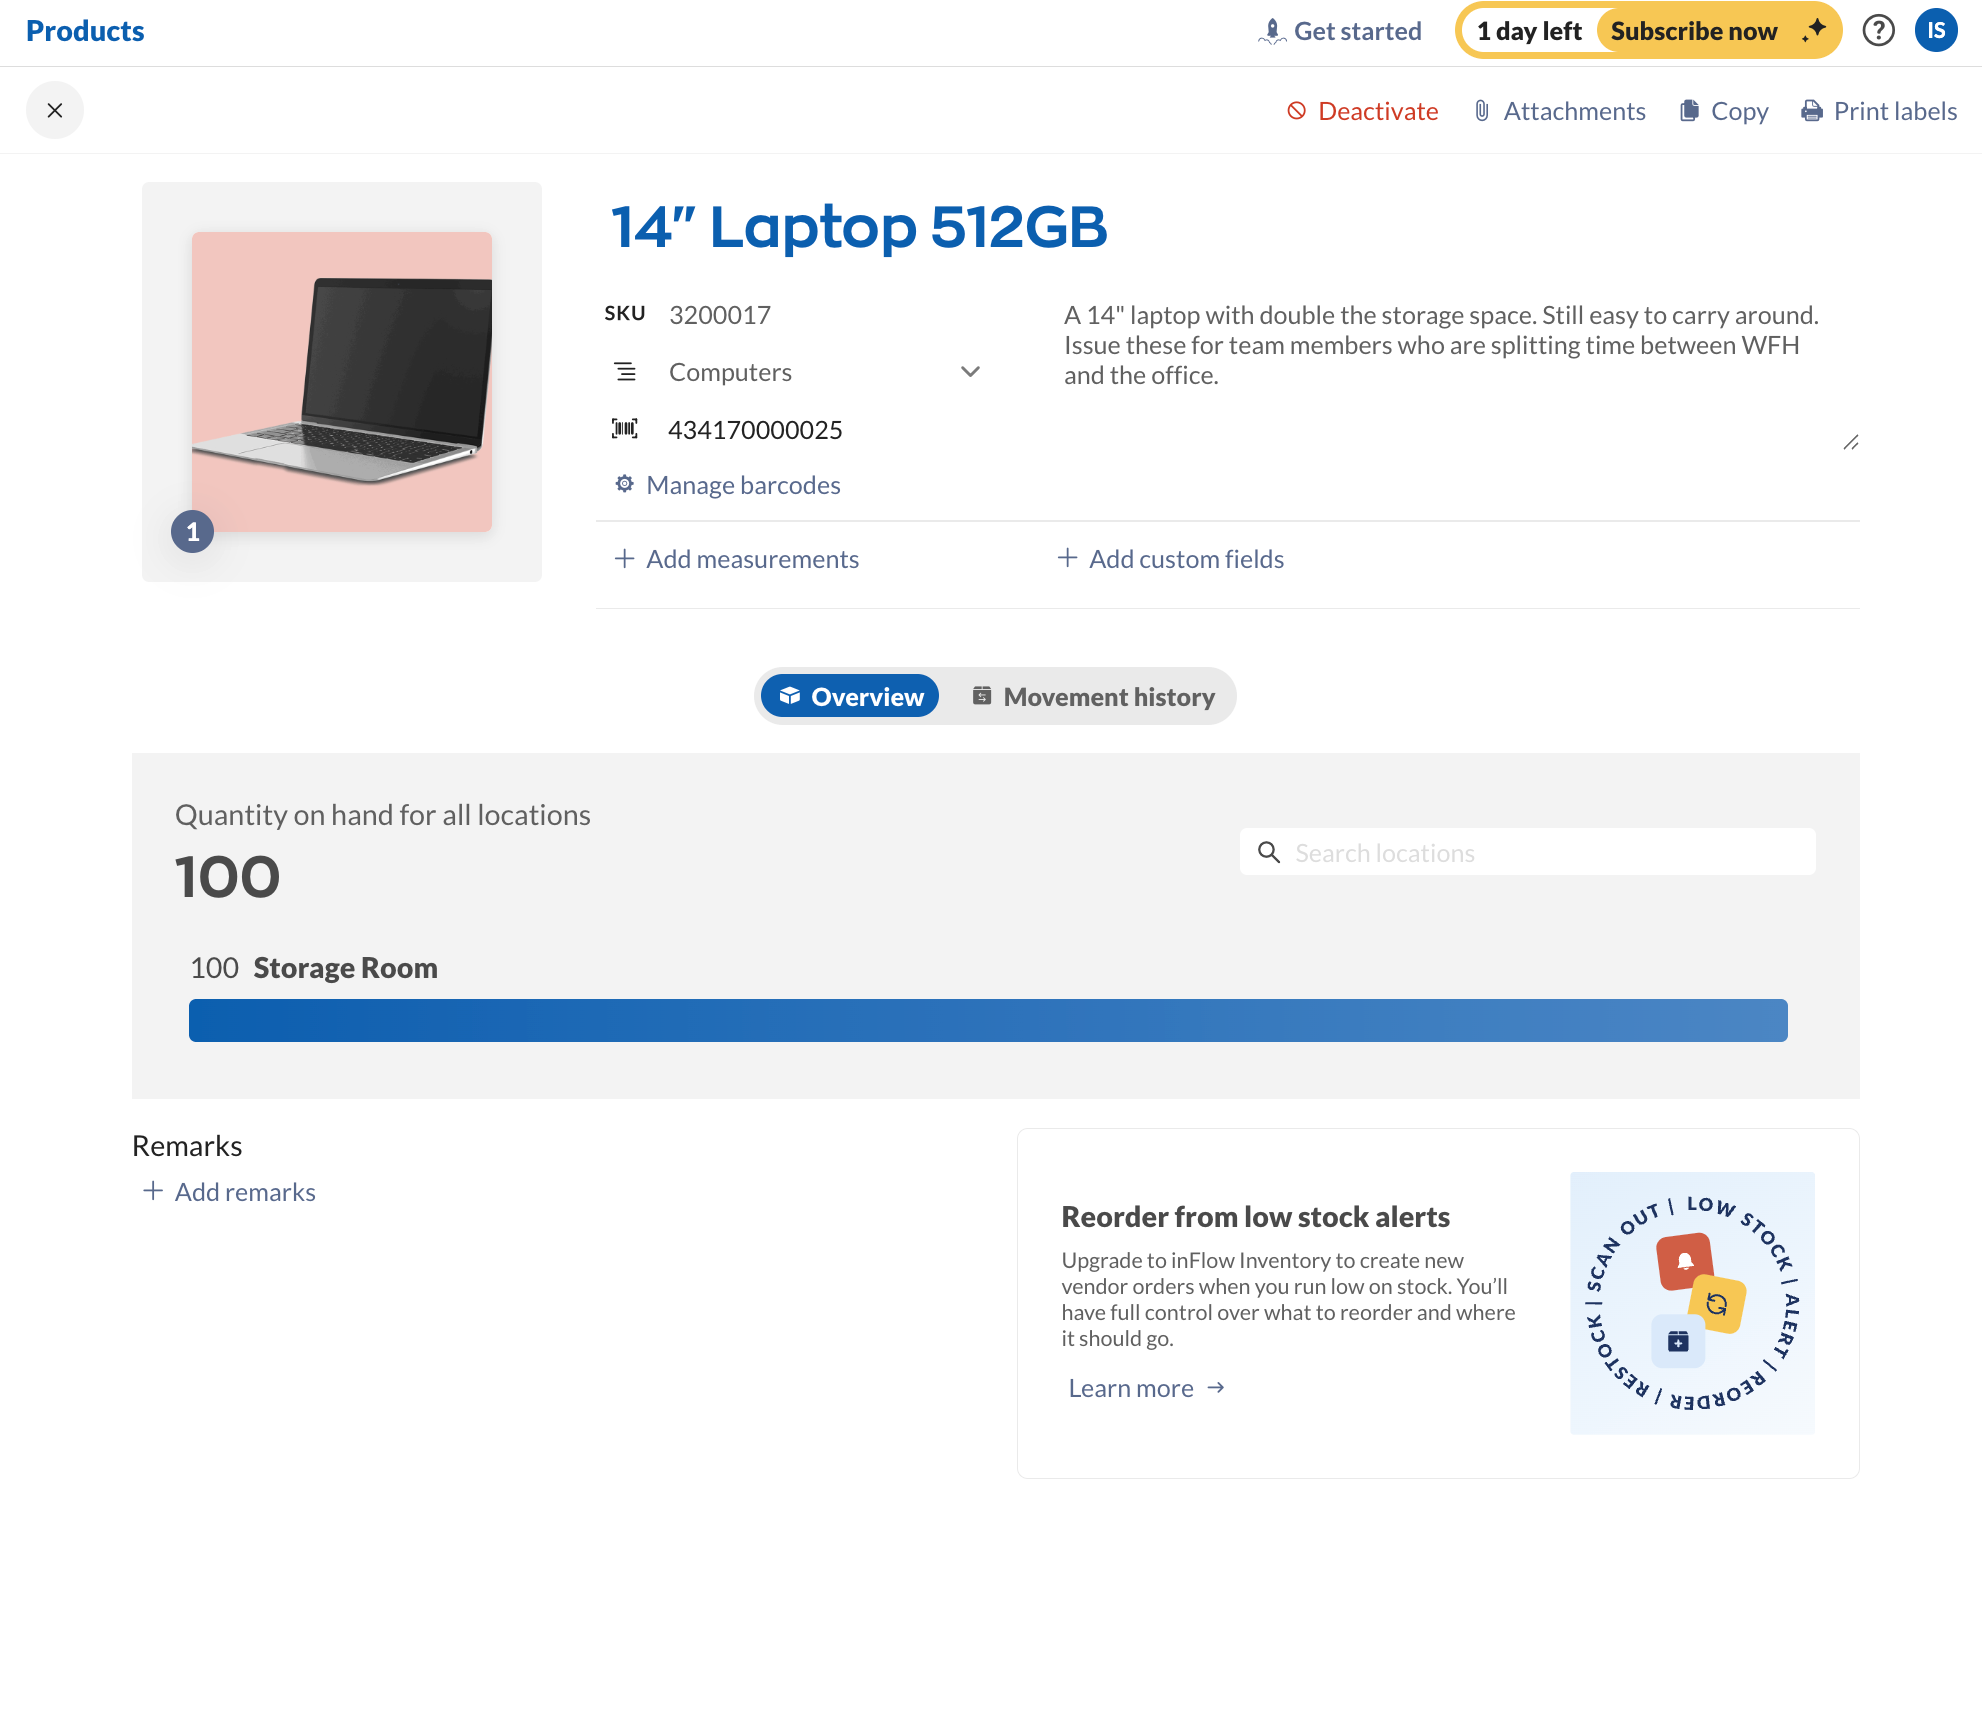
You’ll be directed to the product record. Here you can add:
- Product images
- SKU
- Category
- Barcode
- Description
- Measurements
- Custom fields
- Quantity on hand
In the action bar at the top right of the screen, you can select Deactivate if your team no longer tracks this product.
The Attachments button lets you add a file to the product record. Click on Copy to duplicate the product. Select Print labels to print labels for this product.
After making changes, click Save at the top-right corner of the screen.


0 Comments